After a couple months of investigation, I decided to try my hand at a simple model railroad layout. Due to space (and financial) constraints, I've decided to go with an N-scale layout on a small 2'x4' table in my office. Almost went with 2'x3', but the track plans I could find look really 'toy like' as most are very circular. More about track plans later.
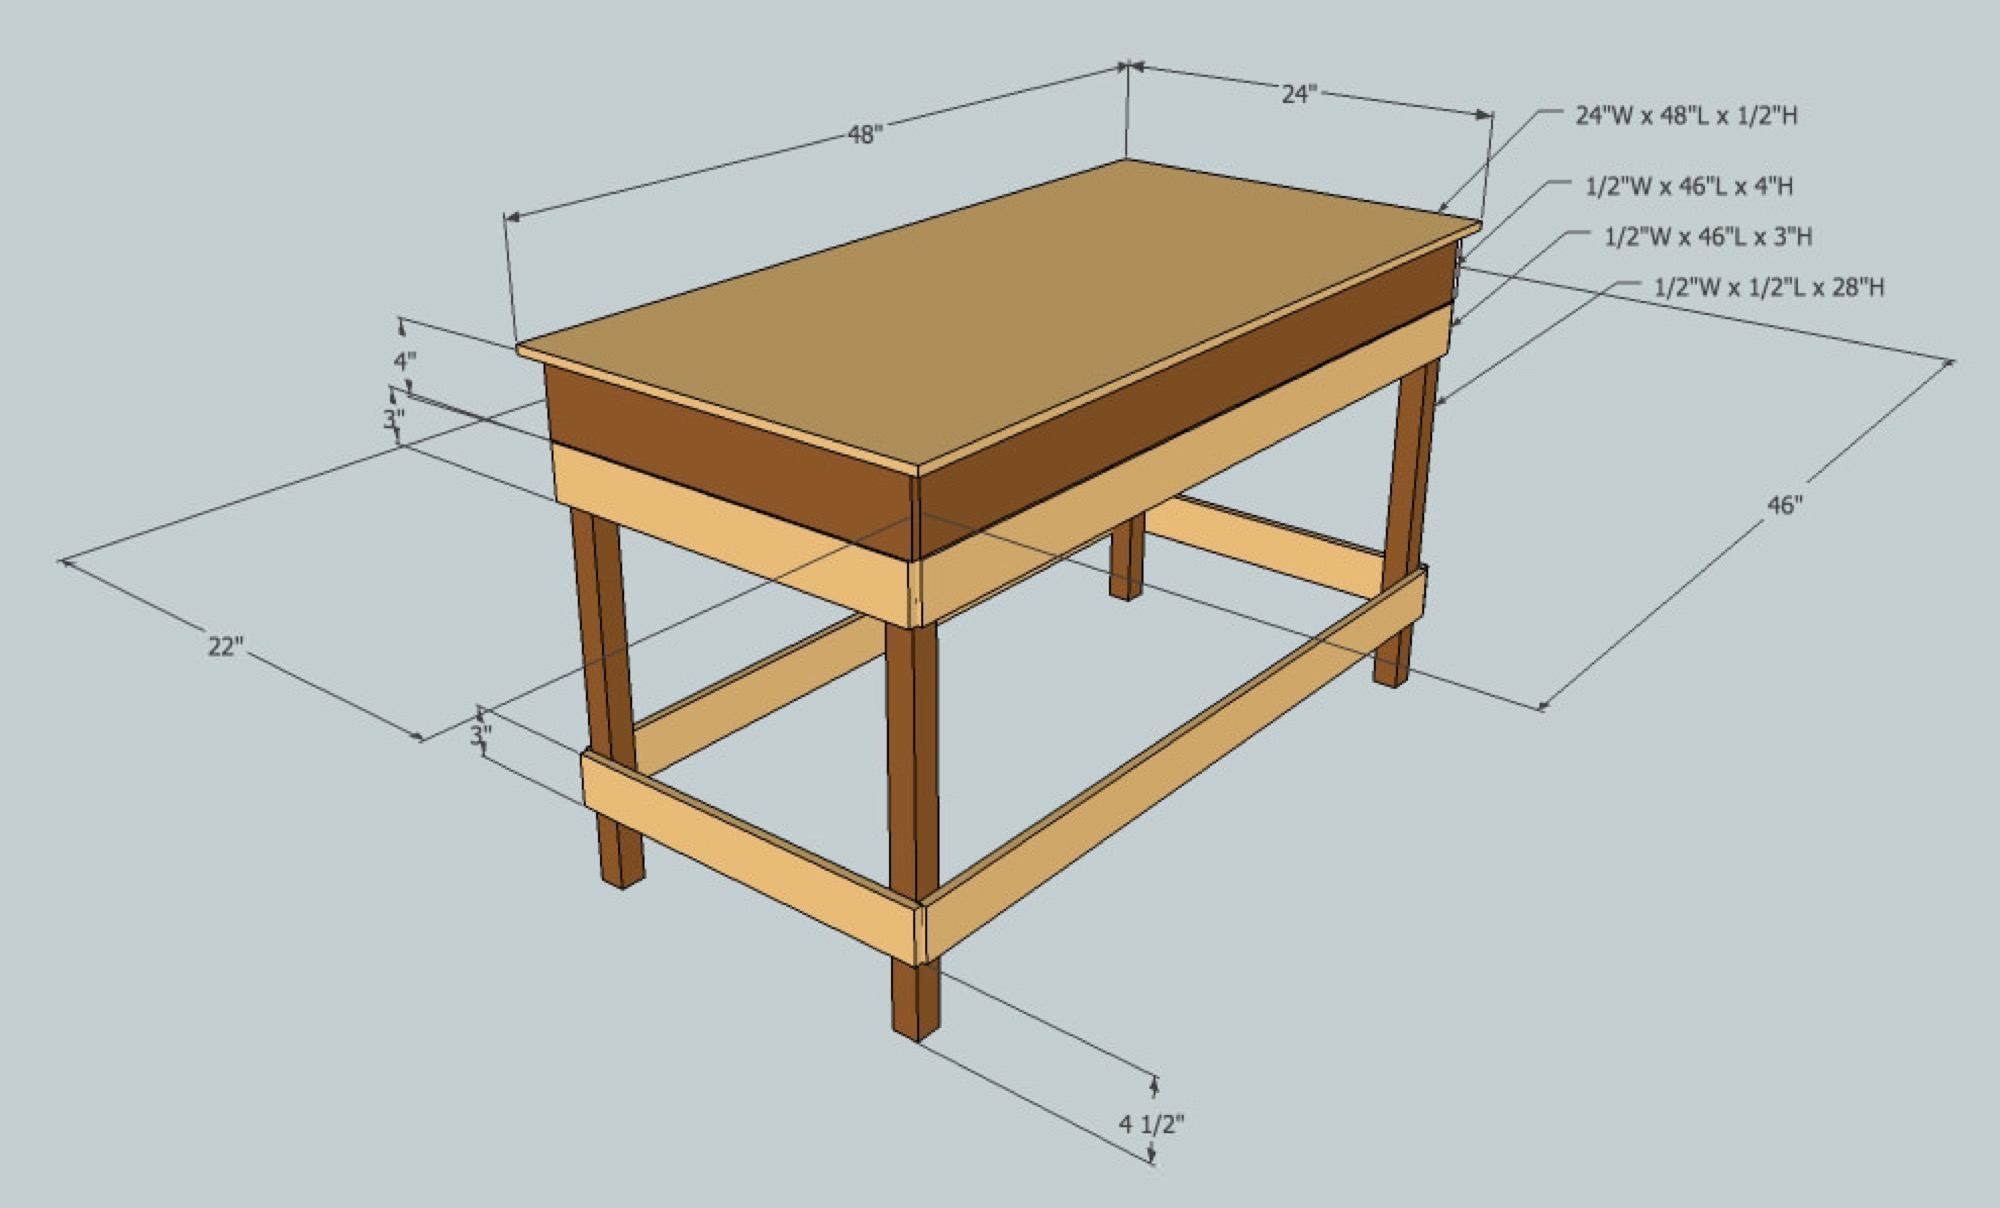
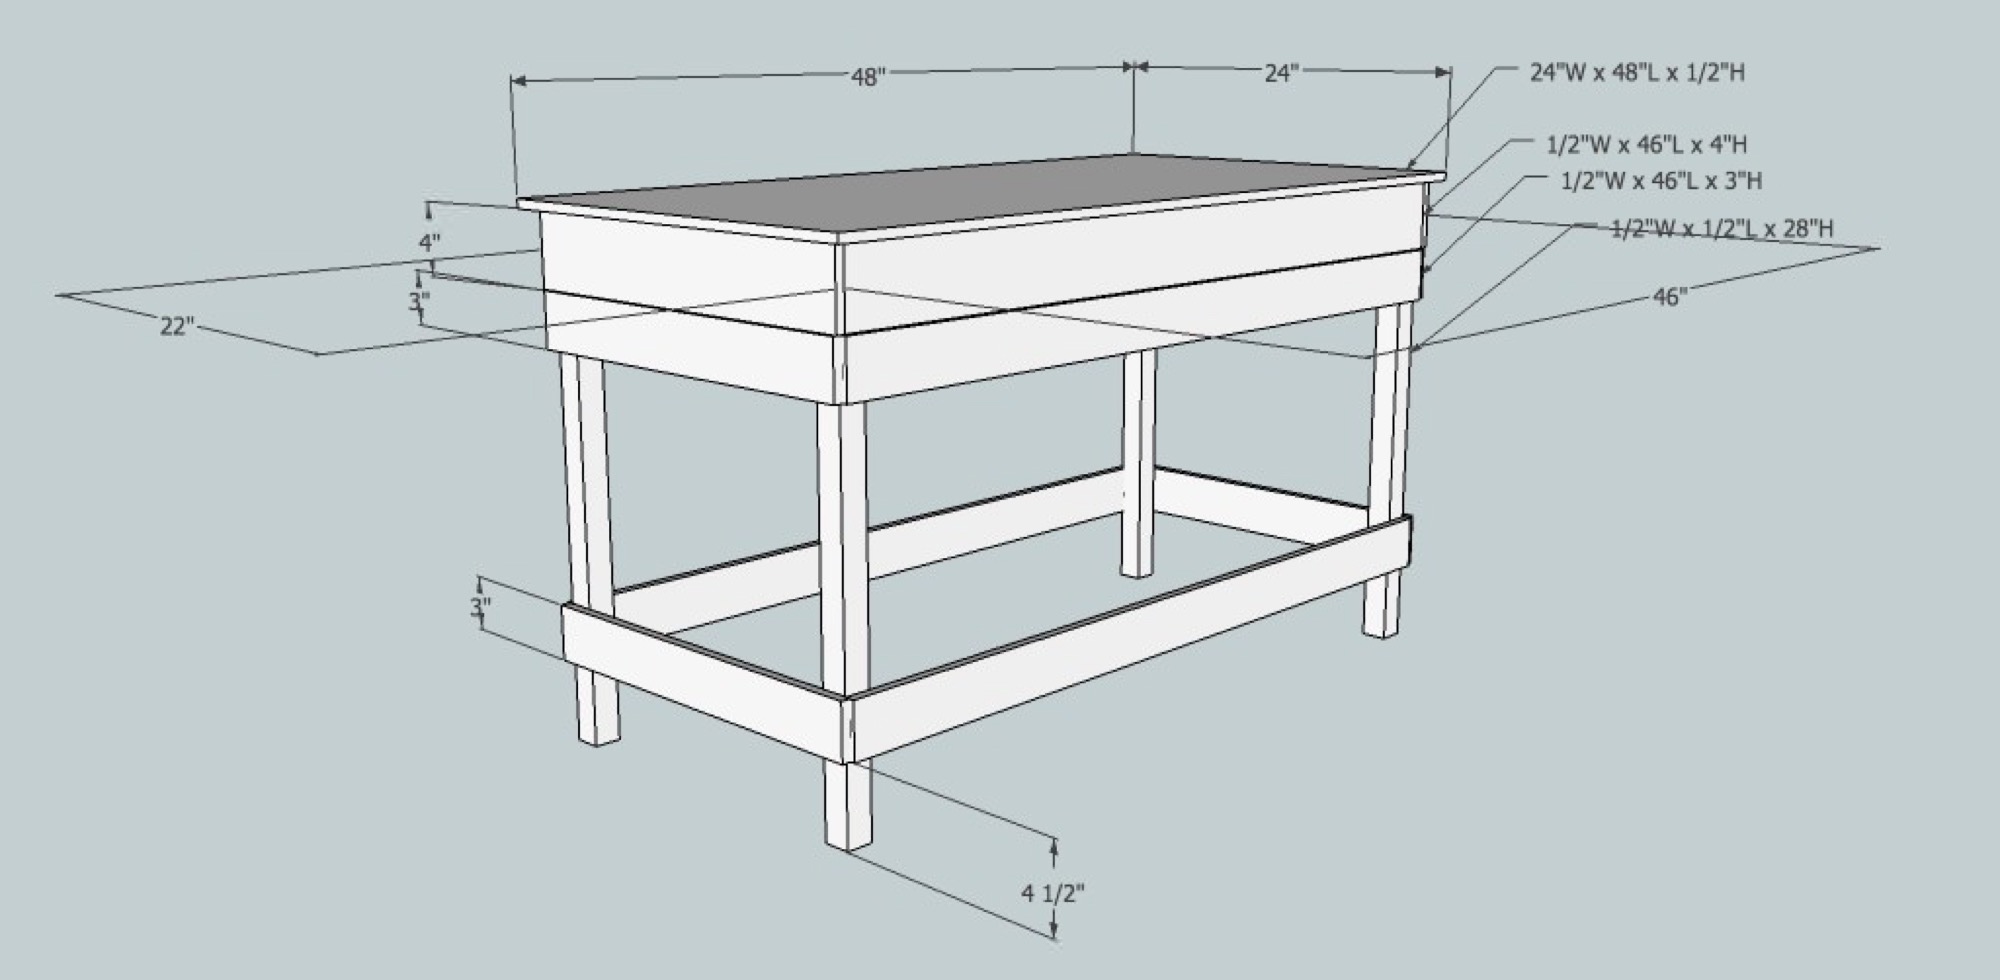
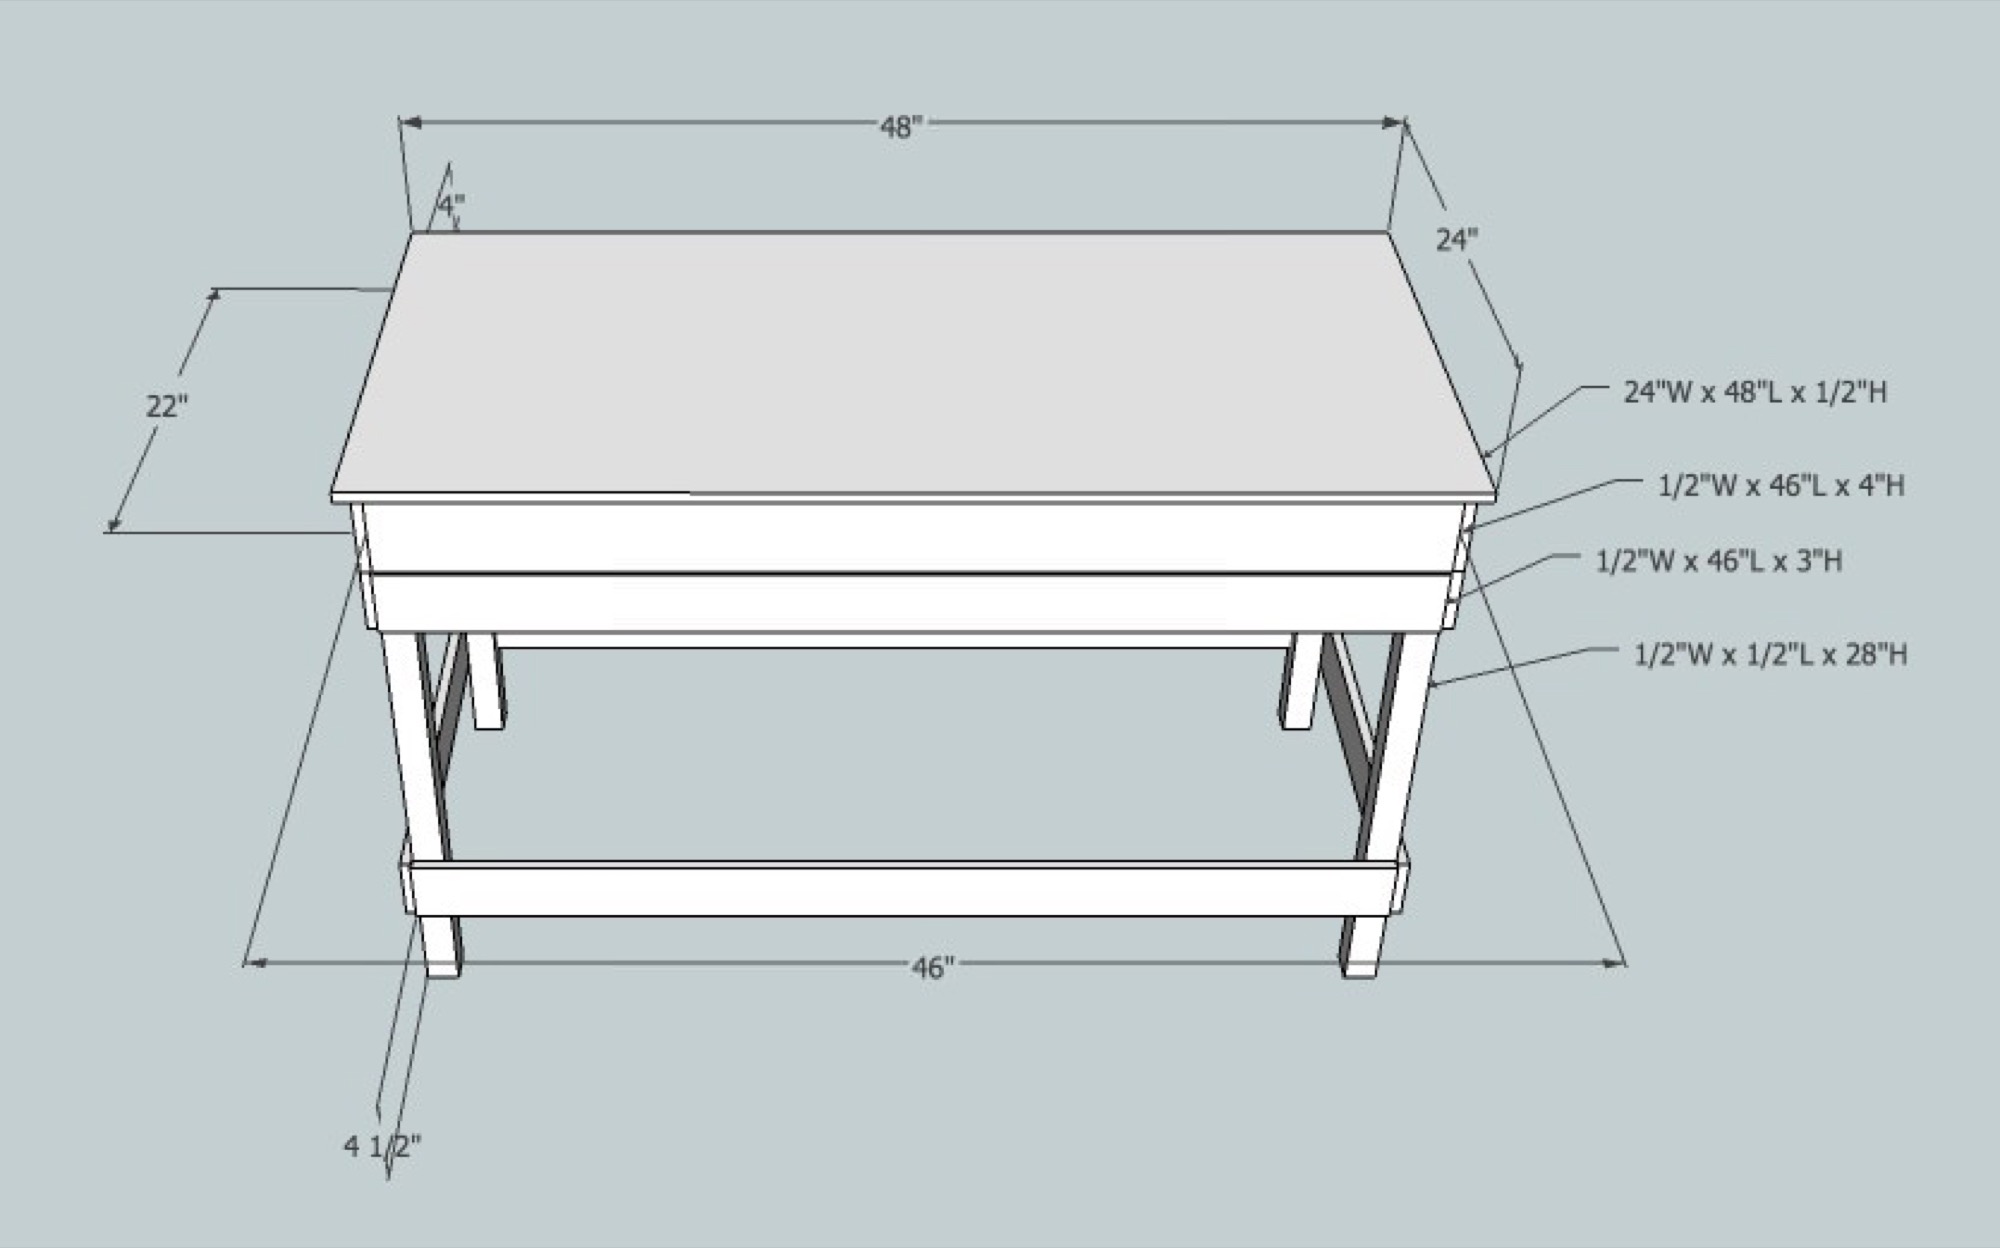
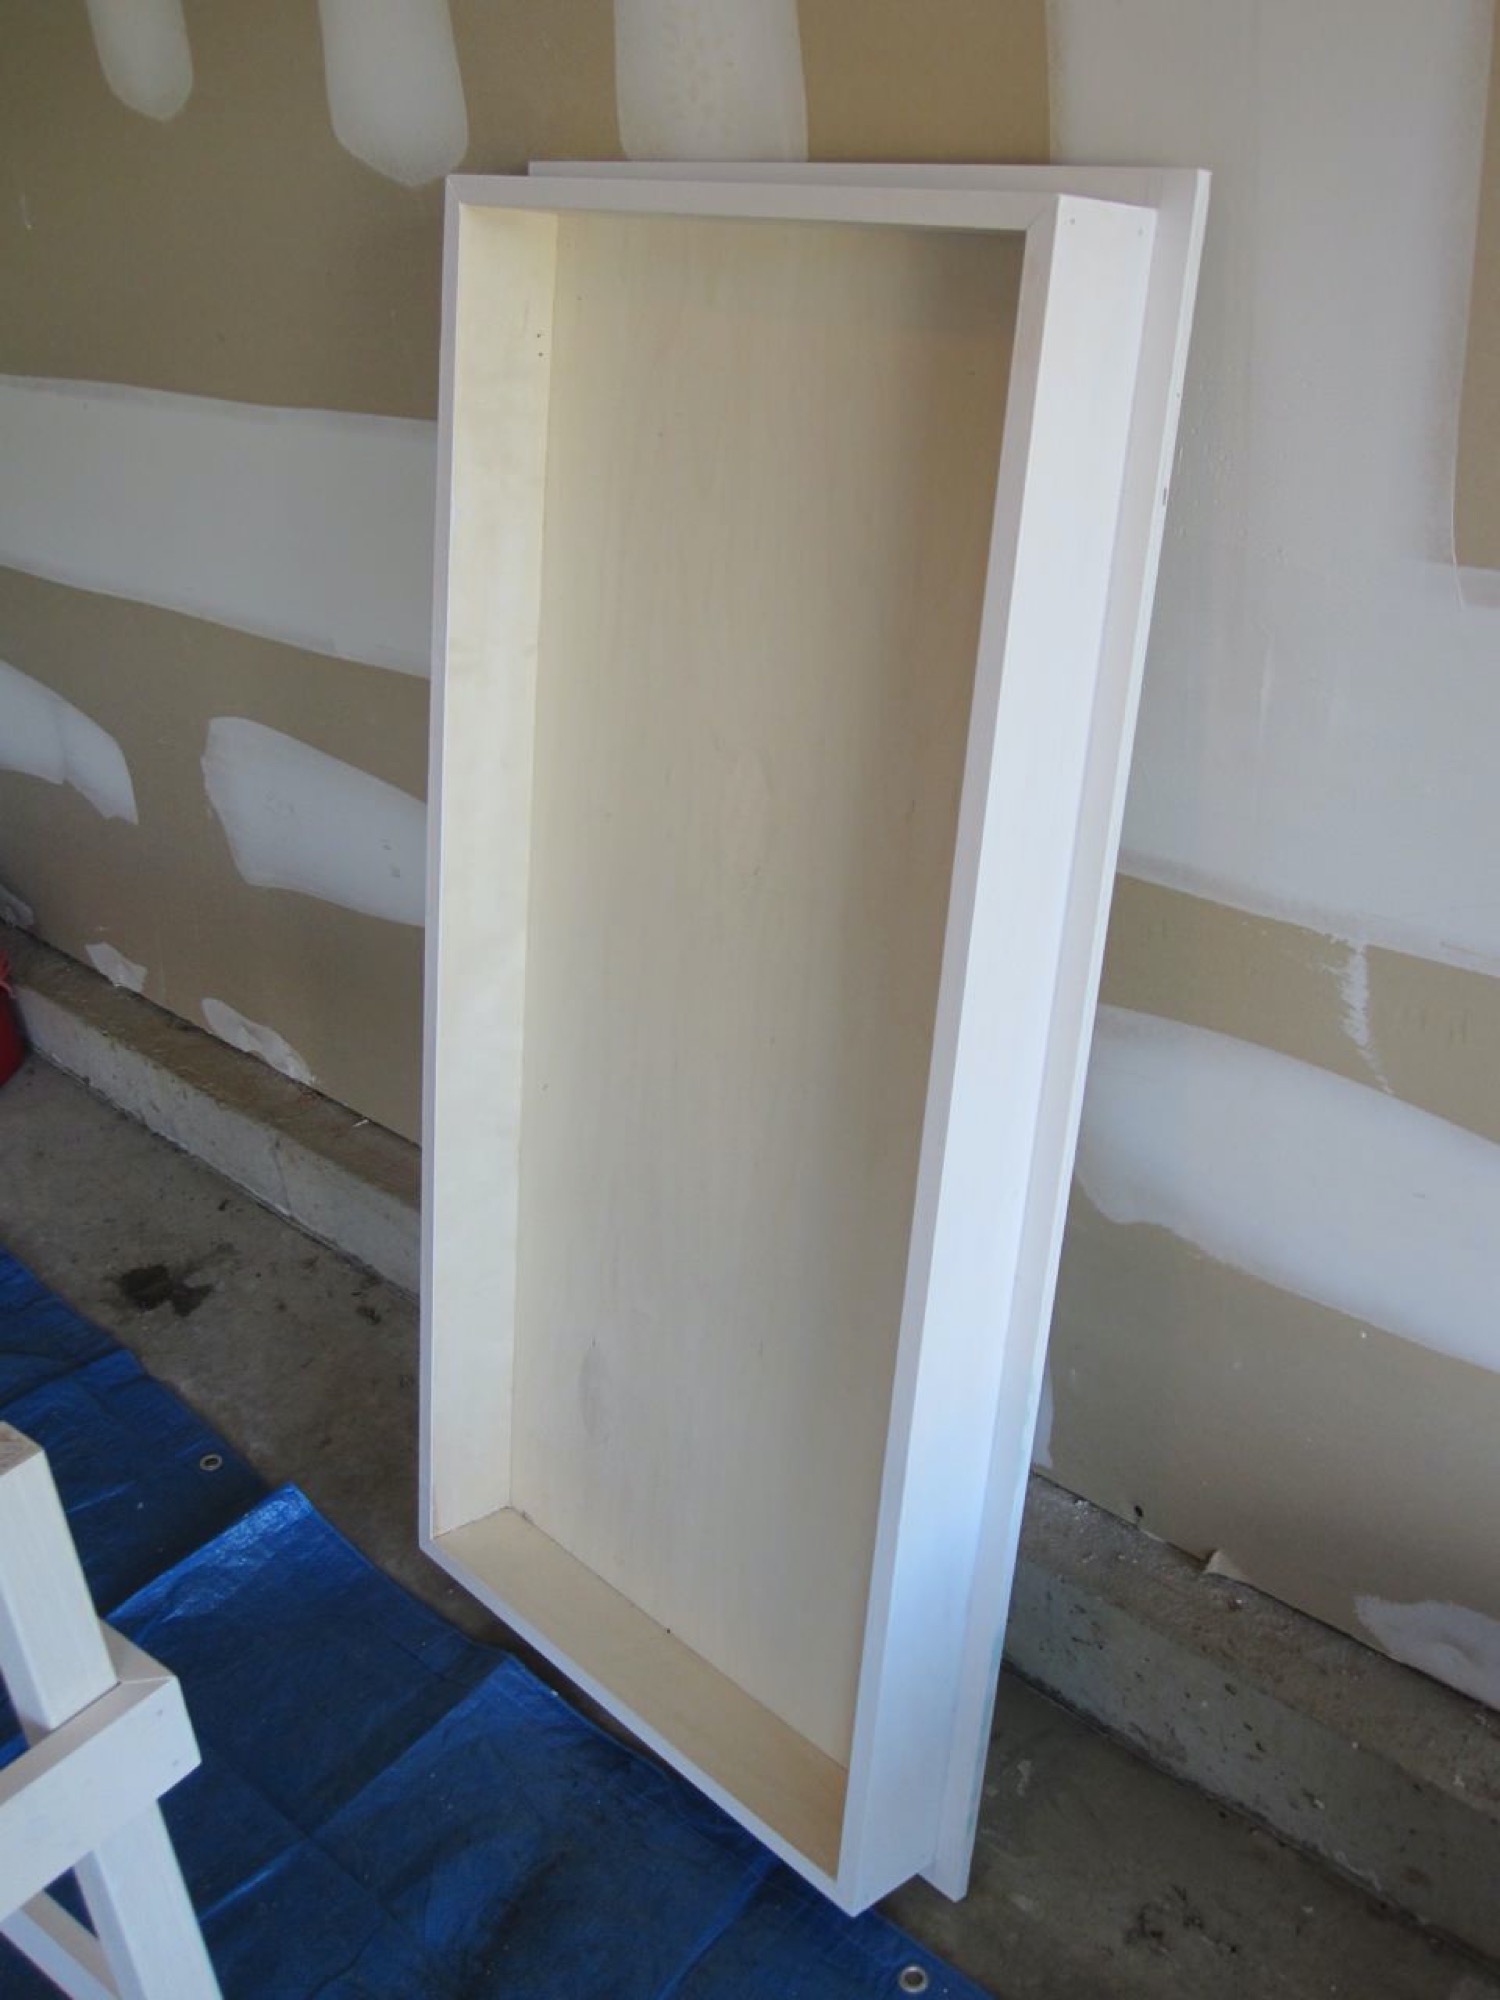
The first thing I need to do is build some benchwork. Most of the research I found show some pretty crude 2x4s with a plywood top. If this was going in a basement or garage, that would be fine, but mine is going in a finished office alongside some pretty decent furniture. A poorly constructed, rough table sitting in the corner is going to look really out of place and could cause enough of a stir in the house to scrap the entire project. I did a little sketching on graph paper and then gave Google SketchUp a shot to polish things up. I had never used it before, but after fooling around for an hour or so I started to get the hang of it. All the images in this post are rendered out from that app.
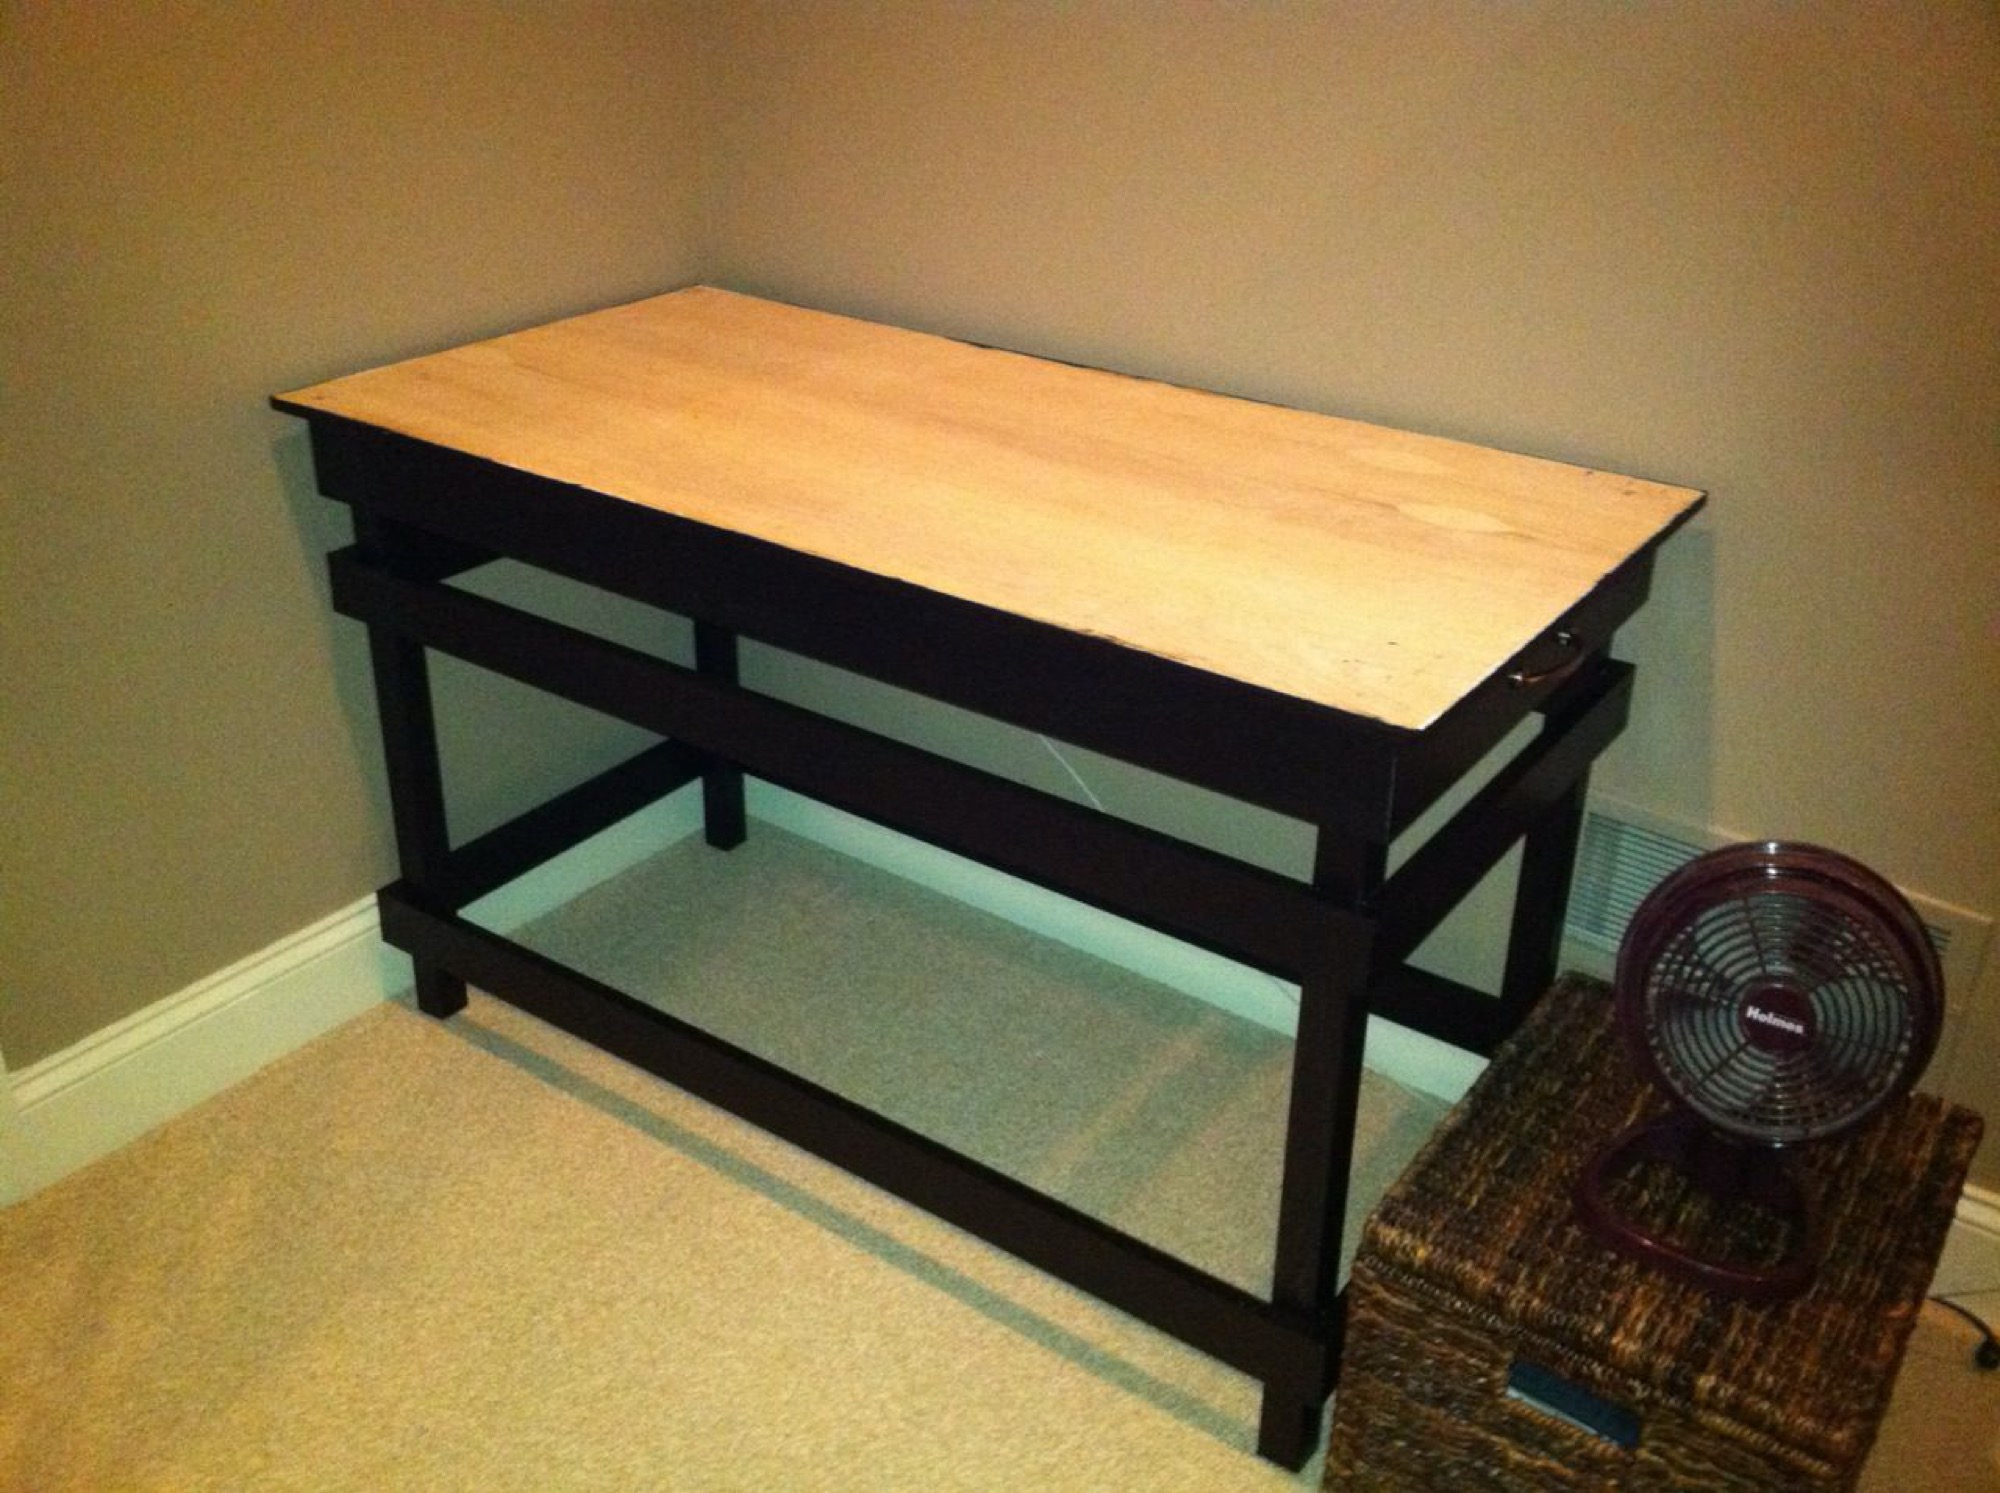
Aside from a nice looking table, I wanted to be able to take the entire 2x4 top off of the frame easily. So the design allows the table to sit snugly (hopefully) on top of 4 legs and lift on and off as needed. The table is pretty small, so I'm thinking that stability shouldn't be an issue. I broke with the hobby's convention of a 36"-48" height and went with 28" legs to match the rest of the furniture in my office and to allow me to work at the table using a standard office chair.
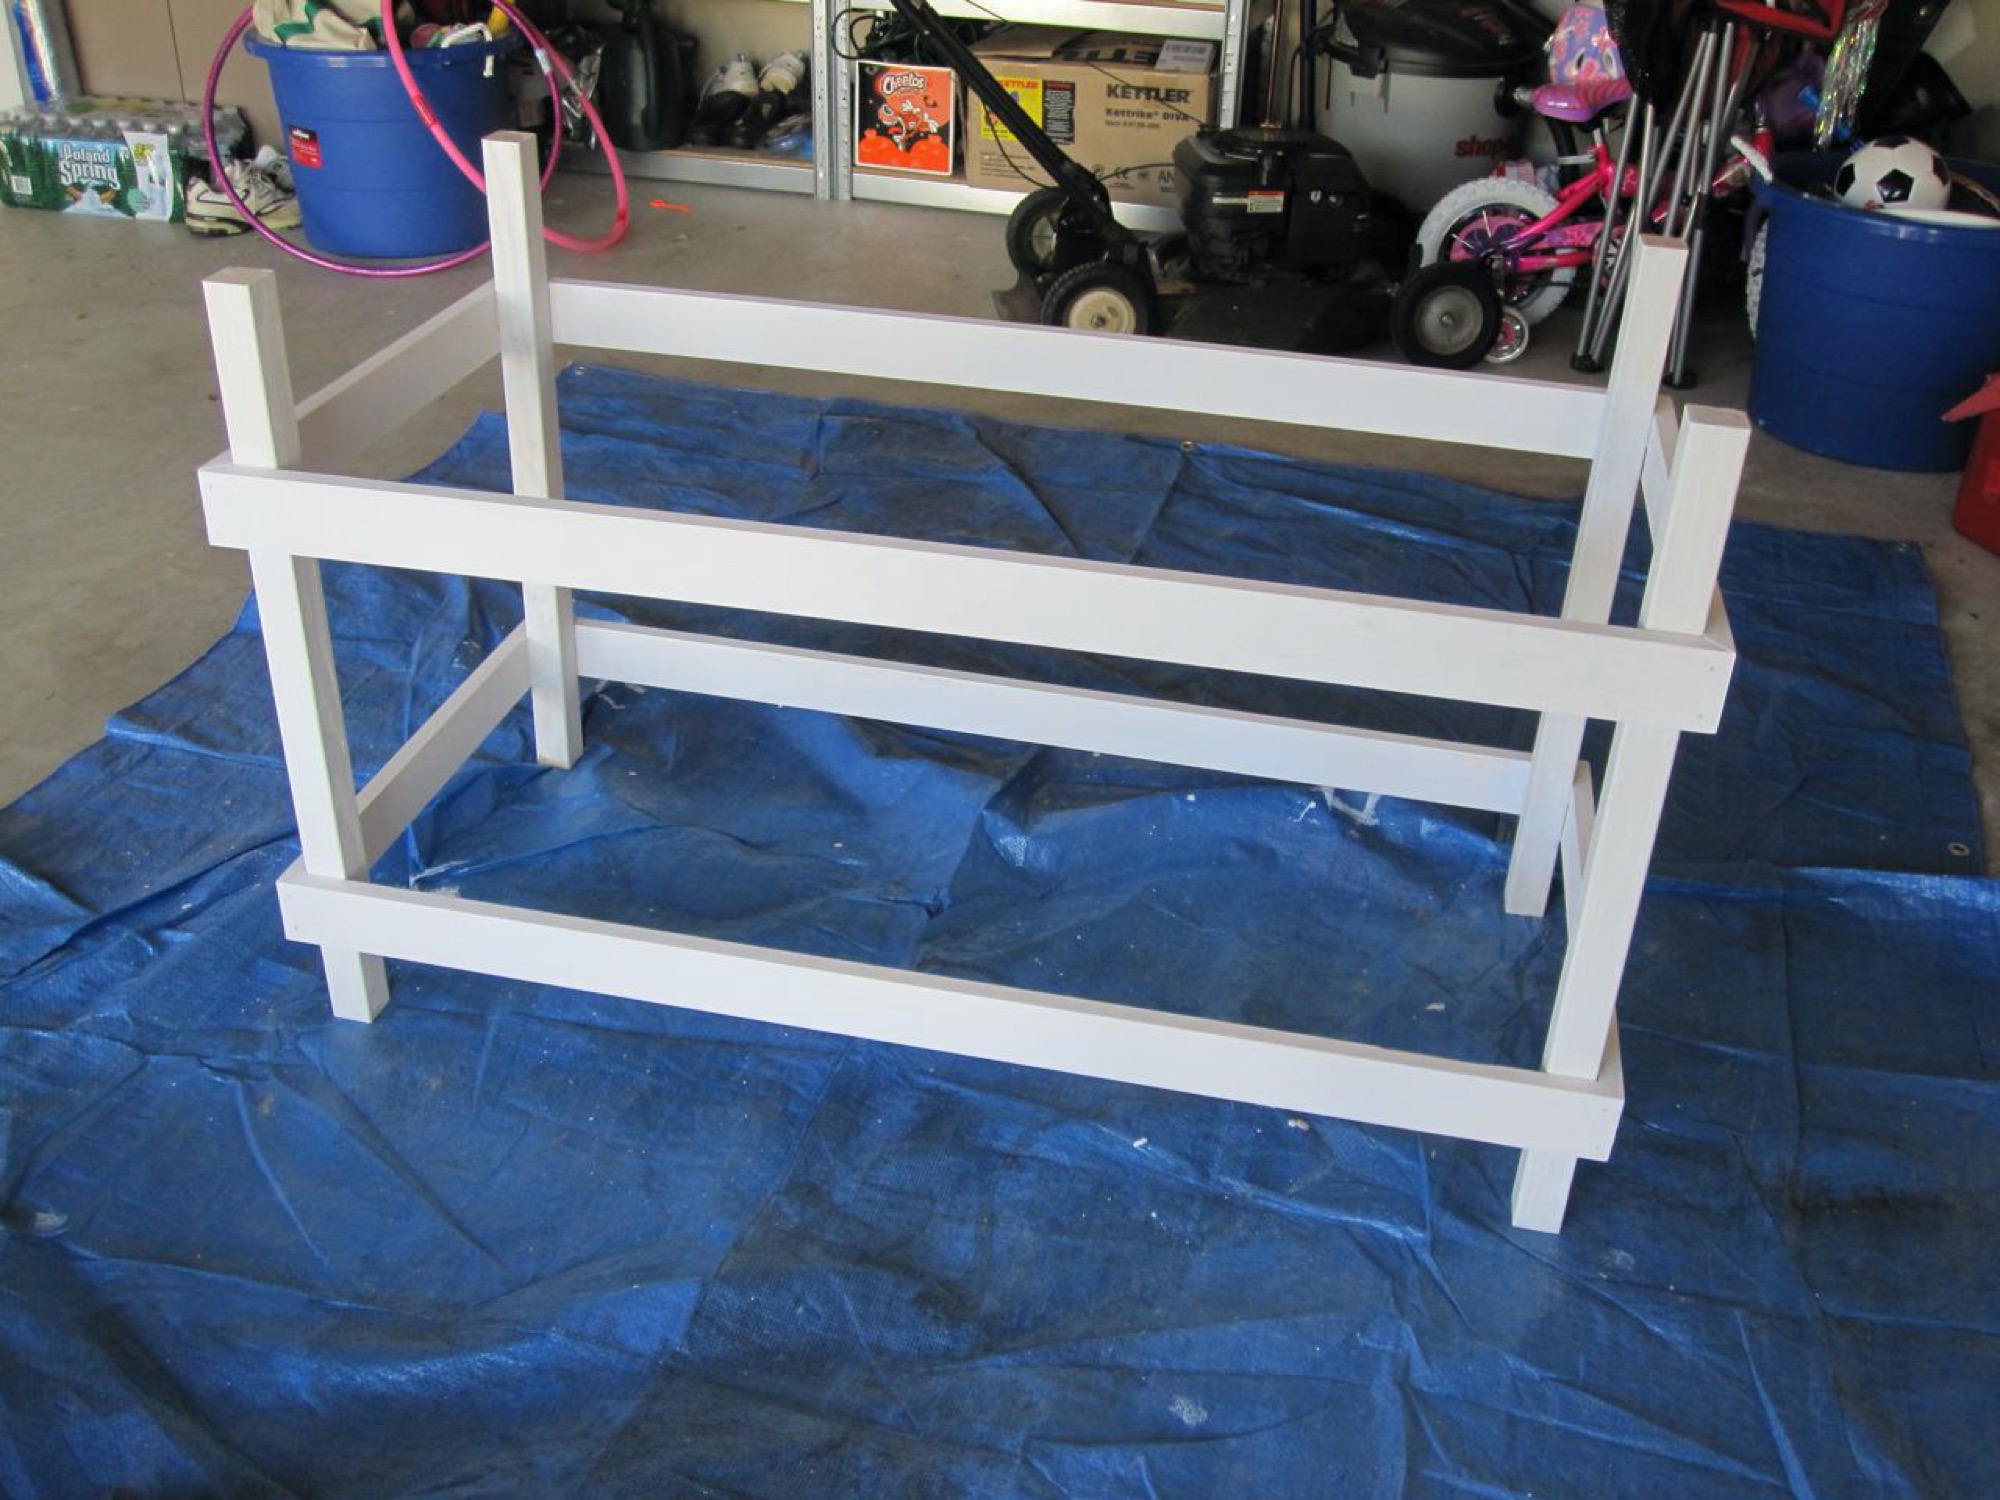
I went to my buddy Mike V's tonight and we got some of the wood cut. A couple more pieces to cut and then we move on to assembling the pieces. I've got pretty much zero experience with this type of woodworking, but Mike's built some really nice workbenches so I'm tapping him to give me a hand.
I've posted a couple of images from SketchUp. You can completely ignore any colors - they are just for separating the different sized boards visually. When finished, I want to paint the entire piece a satin black to match the rest of the furniture in my office.
Six months later and I've finally finished this benchwork and got it in my office. It was definitely not due to the complexity of the project, but it had everything to do with finding the time to finish up the remaining steps. I was especially mindful of the crazy humidity this summer with regards to painting it. I've had a couple experiences in the past with painting wood projects during humid weather and the piece seems to have a forever 'tackiness' to the touch - something I definitely didn't want on this piece.
I was surprised that it took me about four coats to really get a nice, clean look. I intentionally sized it in proportion to the rest of my office furniture and I'm really happy with the way it turned out. Obviously the top of the table has been left unfinished because the entire surface will be covered with the train layout. The top does fit a little tighter than I'd like (I'm sure not helped by all the coats of paint), but hopefully that won't be a big issue if/when I ever need to remove it done the road. Finally, I finished off the piece with some cheap, small carpet 'feet' and a pair of brushed nickel handles (to match my other furniture) so I can easily move the entire thing around to work on all sides. I've also got to send one more shout out to my friend Mike V for all of his help with the project.
In-between the various stages of building the benchwork I've been doing a lot of research into different track layouts and real life prototypes, trying to find a good combination that interests me. More on that later.